Preparations
- Create a directory simpleDemo
and start up the NetBeans program. The exact way to do this depends on your
operating system.
- Create a new Project simpleDemoProject
and mount your directory simpleDemo:
- Choose menu Project/Project Manager
→ the Project Manager window opens.
- Choose New, enter simpleDemoProject
into the pop-up window and press Ok.
- Open the context menu of Filesystems
(by right-clicking the Filesystems icon (
 )
in the Filesystems window, the panel at the left)
and choose Mount/Local Directory.
)
in the Filesystems window, the panel at the left)
and choose Mount/Local Directory.
- Locate your simpleDemo directory
with the file browser, select it with a single click and press Finish.
The Filesystems window now contains an entry for
your directory.
- Choose a template as a starting point:
- From the context menu of the simpleDemo
directory (remember: right-click) choose New/All Templates...
→ the New Wizard window opens and displays
a list of templates to choose from.
- Open the Java GUI forms (by double-clicking
the name or with a single click on its
 symbol), select the JApplet Form and press Next.
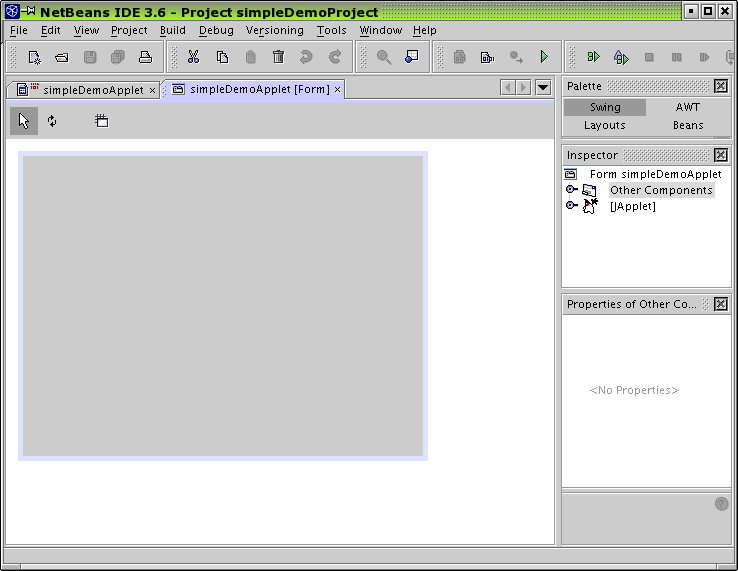
- Enter the name simpleDemoApplet
and choose Finish → two tabbed panels appear
to the right, one named simpleDemoApplet containing
the source code created so far, the other one (simpleDemoApplet
[Form], the form window) showing a grey rectangle and a lot of
tools to the right. Have a look at both by clicking at their tabs. We
will work with the form window, so bring it to the front.
- Since we need the space (except if you have a large screen),
close the Filesystems and Runtime
windows by clicking their close icons
 .
Don't panic: You can bring them back at any time by selecting them from
the Window menu.
.
Don't panic: You can bring them back at any time by selecting them from
the Window menu.
The NetBeans window should now look like this: