Configuring Beans
Now we configure the beans by providing values for all properties that
are different from their defaults.
-
Begin with the first label:
- Select it, either by clicking at the label text
(jLabel1) in the form area or by clicking
at its entry in the inspector. The properties window now shows a
list of all properties of the JLabel bean.
Scroll through the list to get an idea of some of its features. The
left part of an entry is the property name, the right part shows
its value and allows to edit it.
- To change the label text click at the current
value jLabel1 of the text property and
enter the new text argument 1 =. After
typing you have to confirm the new value with <Enter>. Depending on the position of the beans
the new string might not be displayed completely, because it
overlaps with the text field to its right. In that case rearrange
everything until it fits better. If that doesn't help you can
resize the label field explicitly by dragging an edge of the blue
box that surrounds the label text in the form.
-
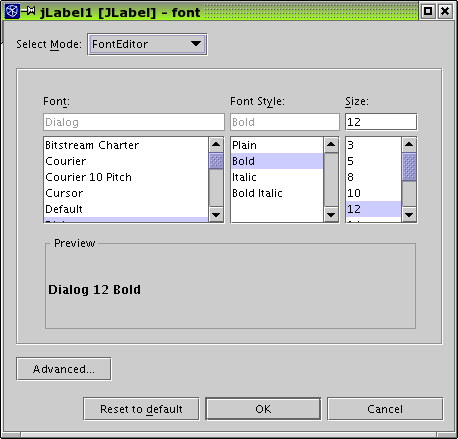
To change the font click at the icon (
 ) to the right of the current font value
Dialog 12 Bold. This opens the special
custom editor for the font property:
) to the right of the current font value
Dialog 12 Bold. This opens the special
custom editor for the font property:
- Use the three lists to select SansSerif 14 Bold and confirm with OK.
-
Configure the other two labels similarly:
- Change the other two fonts to SansSerif 14 Bold.
- Change the text of the second label to argument 2 = and of the third to result =.
- Resize the labels and rearrange everything, if
necessary.
-
Configure the the three text fields identically:
- Set the text to "" (i.e. delete all text).
- Set the font to SansSerif 14
Plain.
- Set the value of the columns property from 0 to 15.
The sizes of the text fields might look strange now. Don't play too
much with the sizes and exact positions, we will care for that later.
-
Make the third text field into an output field:
- Set the editable property
of jTextField3 to false by clicking at the checkbox, which removes the check
mark.
- Set the background property
of jTextField3 to white
[255,255,255]. This can be done easily with the color editor by
choosing the RGB tab and setting all three
sliders to their maximal values.
-
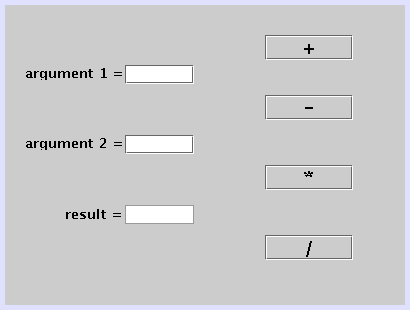
Finally configure the four buttons:
- Change their texts to " + ", " - ", " * " and " / ".
- Set the fonts to SansSerif 18
Bold.
The result now looks similar to the following: