Fixing the Layout
The arrangement of the components still looks rather ugly. The easiest way
to fix that is to set the sizes and positions of all components by hand. This
approach is simple but has several drawbacks:
- Changes in bean properties like texts or fonts may lead to
a rearrangement of many components.
- If one wants to change the applet size one has to arrange
everything manually.
- The layout may not be portable: If f.i. one of the fonts
used is not available on another machine, the chosen size of a component needs
to be adapted to the replacement font.
For that reason the layout in Java can be defined with the help of layout managers,
which implement different general layout strategies and adapt dynamically to
new situations. Consult a standard textbook on Java to learn about the properties
of the different possible layouts. If you are only interested in beans in the
context of the PhysBeans library, you may skip this section, because the layout
of PhysBeans applets is fixed by templates, which are provided by the library.
- As an intermediate step to simplify the following rearrangement,
change the global layout of the applet to FlowLayout:
- Right-click the JApplet-Entry
in the inspector window.
- From its context menu choose Set Layout/FlowLayout.
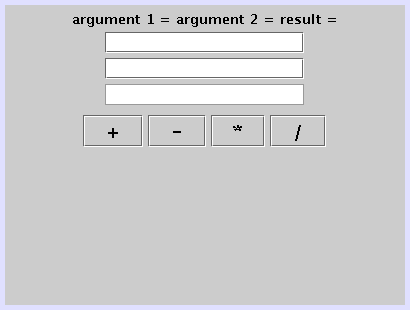
All components change their positions and posssibly their sizes, everything
is completely mixed up.
- Add a JPanel bean (
 )
from the palette. It shows up as a small empty blue square. If you click anywhere
in the form window, it apparently disappears, but a click on its entry in
the inspector window makes it visible again.
)
from the palette. It shows up as a small empty blue square. If you click anywhere
in the form window, it apparently disappears, but a click on its entry in
the inspector window makes it visible again.
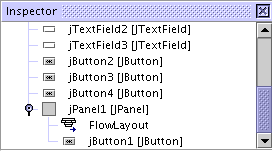
- Put the plus button into this panel:
- In the inspector window open the jPanel1
by clicking on its open icon.
- Click at the jButton1 entry and
begin to drag it. During the drag it is represented by a horizontal line.
- Move this line between the jPanel1
entry and its FlowLayout and release the mouse
button. The plus button is now positioned inside the panel, which is reflected
in the inspector window by the indentation:
- Similarly put the other three buttons into jPanel1.
Instead of using the inspector window you can move icons directly in the form
window. In this case the bean is represented by a blue dotted rectangle and
a surrounding panel by a grey dotted rectangle. Look at at inspector window
to make sure that all buttons are actually inside the panel. The form now
looks like
- Add another panel (jPanel2) und
put the first label and the first text field into it. The result should be:
- Repeat the last step twice to put the other labels and
text fields together into jPanel3 and jPanel4.
- Add a last panel (jPanel5) and
put the three subpanels (jPanel2, jPanel3,
jPanel4) into it. This can probably be done best
in the inspector window, if you hide the internal parts of the subpanels by
clicking at their
 icon.
icon.
- Configure the layouts of the panels:
- Use the context menu of jPanel1
to change its layout to GridLayout.
- Click on the GridLayout icon (
 )
and set Columns to 1 and Rows
to 4.
)
and set Columns to 1 and Rows
to 4.
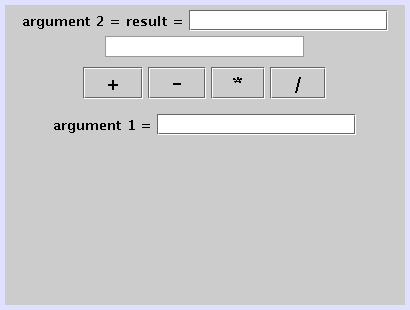
- Change the layout of jPanel5 to
BoxLayout.
- Set the Axis property of the BoxLayout
to Y Axis. Most parts fit together now:
- Fix the global layout of the applet:
- Set the layout of the JApplet
to BorderLayout.
- Find the Direction property of jPanel1
(it is down the property list under a Layout heading)
and change it from Center to East.
- Similarly change the Direction
of jPanel5 to Center.
We are almost done now:
- Change the global size of the form:
- Click on JApplet in the inspector
window and select Code from the menu of the properties
window. The DesignerSize shows the current width
and height of the form.
- Resize the form using its blue border, until the size is
[400,150].
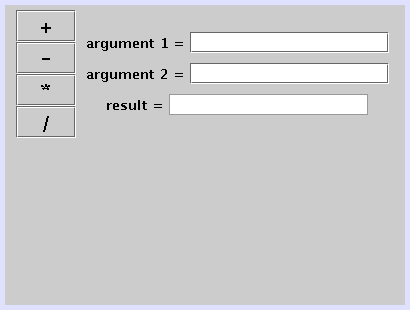
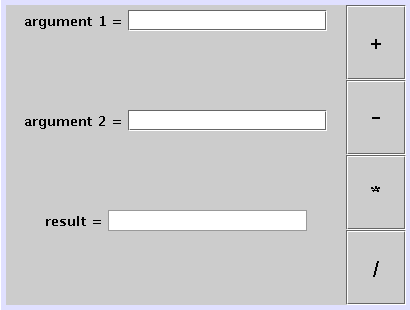
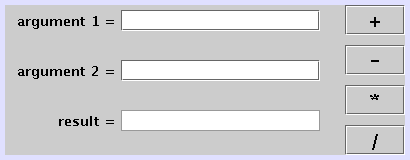
- Polish the layout:
- The GridLayout of jPanel1
has the property Vertical Gap. Set it to 10.
- Set the Horizontal Gap of the
applet's BorderLayout to 20.
- Set the Alignment of the FlowLayouts
for jPanel2, jPanel3
and jPanel4 to Right.
This finishes the graphical user interface of the demo applets, it looks like