- move the mouse over the large horizontal border directly
above the inspector window, the cursor now changes to a double arrow (
 ),
), - drag the border down and enlarge the palette window until you can see two lines of icons,
- enlarge the inspector window in a similar way, using the border right below it, until all three windows have approximately the same height,
- drag the vertical border to the left until it almost reaches the form rectangle to make the whole tools area as wide as possible.
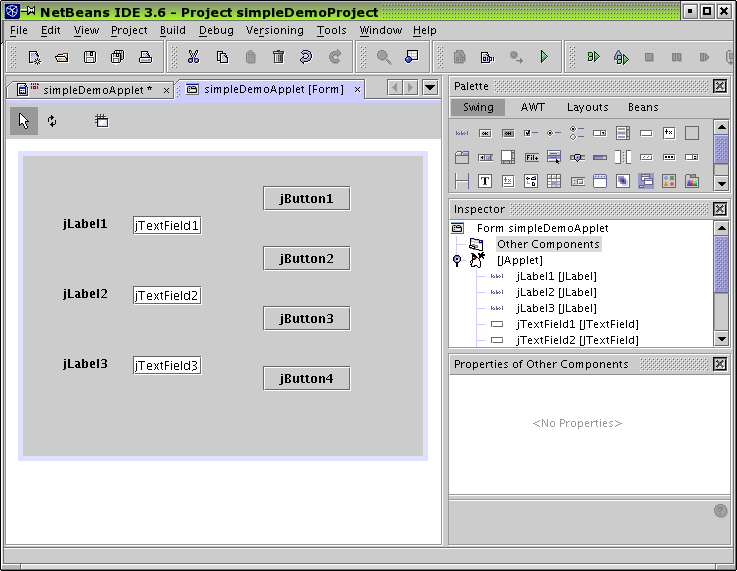
- Locate the JApplet entry
(
 )
in the inspector, open its context menu with a right click and select
Set Layout/Null Layout.
)
in the inspector, open its context menu with a right click and select
Set Layout/Null Layout.
This allows to place all components directly with the mouse.
- If the arrow field in the upper left corner of the form
window is dark grey (
 ):
fine.
):
fine. - If not: simply click on it.
- Find the JLabel bean (
 )
in the palette and click on it.
)
in the palette and click on it. - Click in the grey form rectangle at approximately the position where the label should be. It is shown immediately with the default text jLabel1. Additionally it is displayed in the inspector window.
- Repeat the last two steps twice to add the other labels
- If you like, you can rearrange the labels by dragging them to their correct positions.