![]()
![]() PhysBeans Creating Applets with PhysBeans First Example Applets Polar representation of complex numbers
PhysBeans Creating Applets with PhysBeans First Example Applets Polar representation of complex numbers
![]()
![]()
Open the context menu of the Source Packages node in the Projects window - by clicking on it with the right mouse button - and choose New / Other.... Select the file type ComputeSheet.java from the category PhysBeans and proceed with Next >. Define the file name as Cart2Polar and confirm with Finish. As a result the window of the form editor shows up, which is the central place of all forthcoming operations.
Since you will need some space - except when you have a very large screen
-, you have to tidy up the workspace of NetBeans: First hide the
windows Projects, Files and Services by clicking
on their ![]() icon. They are represented on the left border and reappear after a single
click. Next right-click into the palette window (it is on the right hand
side) and choose the entry Hide Item Names from its context
menu. All available beans are now represented only by their icons, so that
many more can be seen immediately. Now drag the Navigator window
with the mouse and drop it on top of the
Palette window. These two windows now share a common space, one can
switch between them using tabs. Next close the Start Page window
(with a click on the cross icon or via Close from the context
menu of its tab).
icon. They are represented on the left border and reappear after a single
click. Next right-click into the palette window (it is on the right hand
side) and choose the entry Hide Item Names from its context
menu. All available beans are now represented only by their icons, so that
many more can be seen immediately. Now drag the Navigator window
with the mouse and drop it on top of the
Palette window. These two windows now share a common space, one can
switch between them using tabs. Next close the Start Page window
(with a click on the cross icon or via Close from the context
menu of its tab).
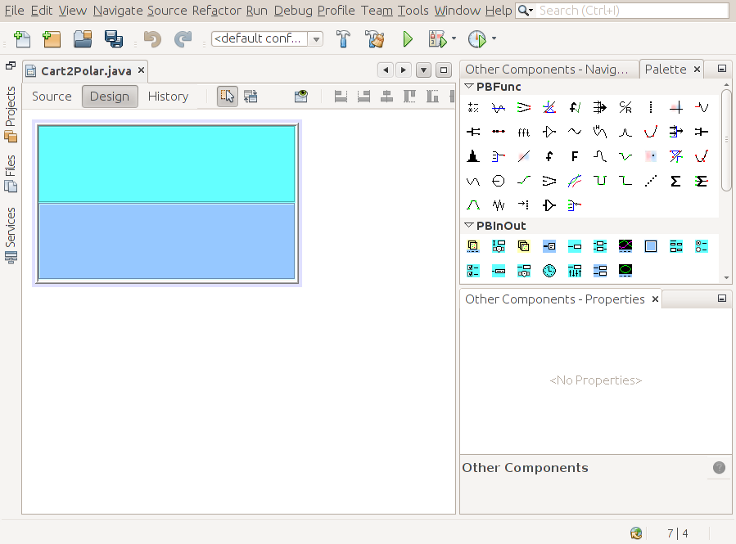
The window of the form editor contains a two-colored rectangle representing the template for the applet with an input panel shown in cyan and an output panel in blue, surrounded by a grey border. Scale down the applet area by dragging its right lower corner. Finally enlarge the windows on the right at the expense of the form editor by dragging the grey bar between them. The result should look like this:
Using the template NetBeans has created quite a lot of Java code. To examine it switch from the Design view to the Source view by clicking at the corresponding button below the Cart2Polar.java tab.
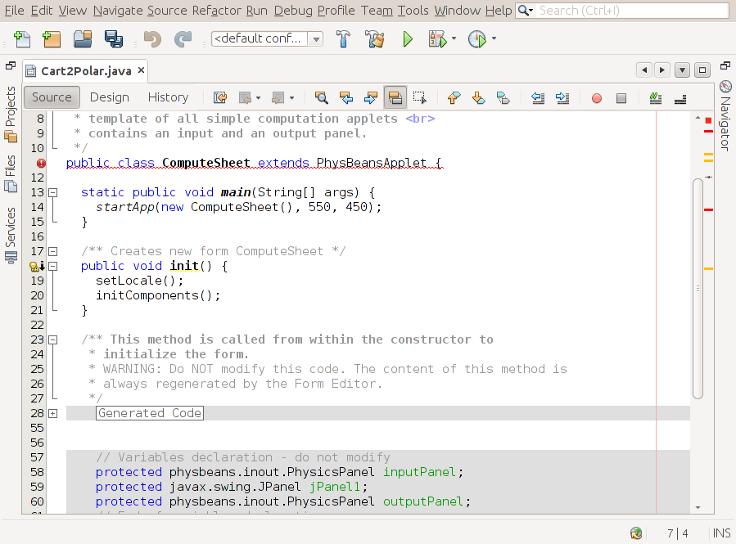
In the lower part you see code with a light grey background. This is guarded code, which has been created as a result of actions in the form editor and which can not be changed manually. At the moment the most part of it is not shown explicitely in the editor, but is summarized as Generated Code . Click on the + icon to the left to see the complete source code.
NetBeans has detected that line 11 contains an error and marked it in red. If you point on it with the mouse, a tool-tip window explains the error: The class ComputeSheet and the file name Cart2Polar.java don't match. Change the word ComputeSheet to the name of the program, here Cart2Polar, in line 11 and in line 14. The numbers 550 and 450 denote the size of the program window, when it is started as an Java application (i.e. not as an applet in a browser). Changes these values to 270 and 140. Finally delete the first line package templates;
Now it is high time to save the result with File/Save or simlpy Ctrl-S. You can already compile the program with Run/Compile File or simply F9. Consequently output messages appear at the lower edge and display the progress of the compilation process and possibly error messages. If everything worked out, the compiler has produced a class file Cart2Polar.class, a remote relative of the typical Windows exe file.
Subsequently you can start the program with Run/Run File or Shift-F6. The program window basically shows the same image as the form editor. You can now change the window size and see how the two panels divide the available space between them.
Close the applet and the output window and switch back to the Design view for the next steps.
![]()
![]()